蓝莓风车酥派塔的做法
 1
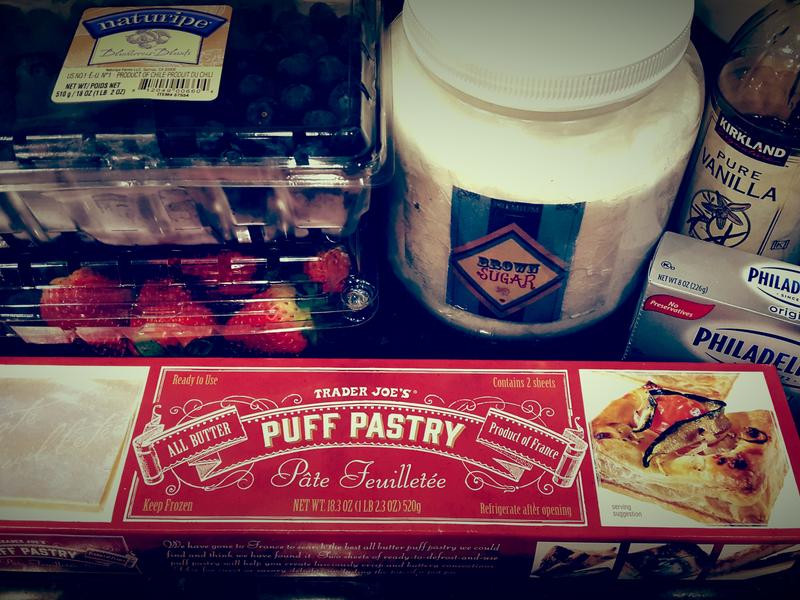
1备料
 2
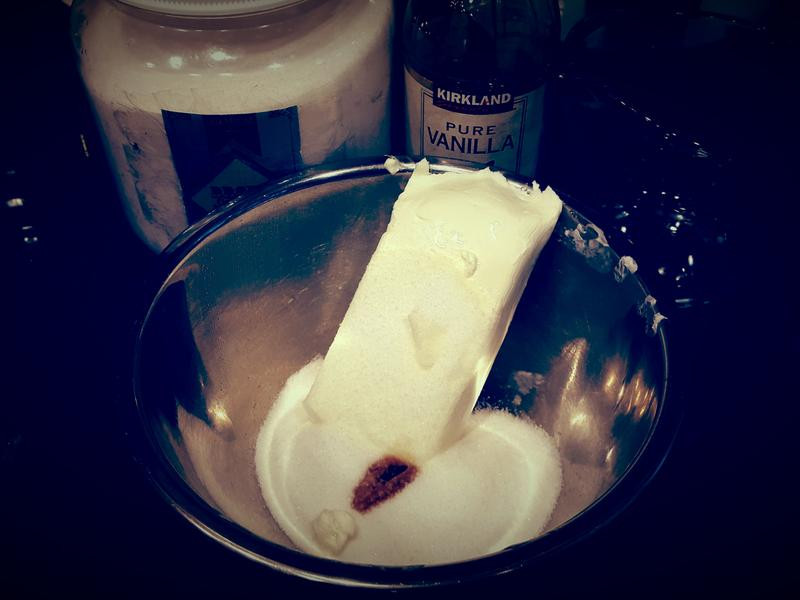
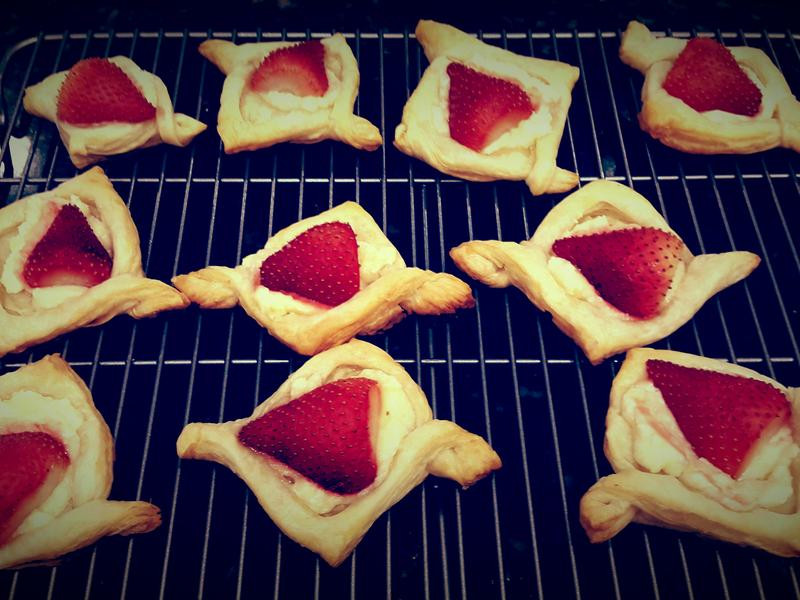
2将奶油奶酪 白砂糖 香精搅拌均匀到软软ㄉ滑润状态即可
 3
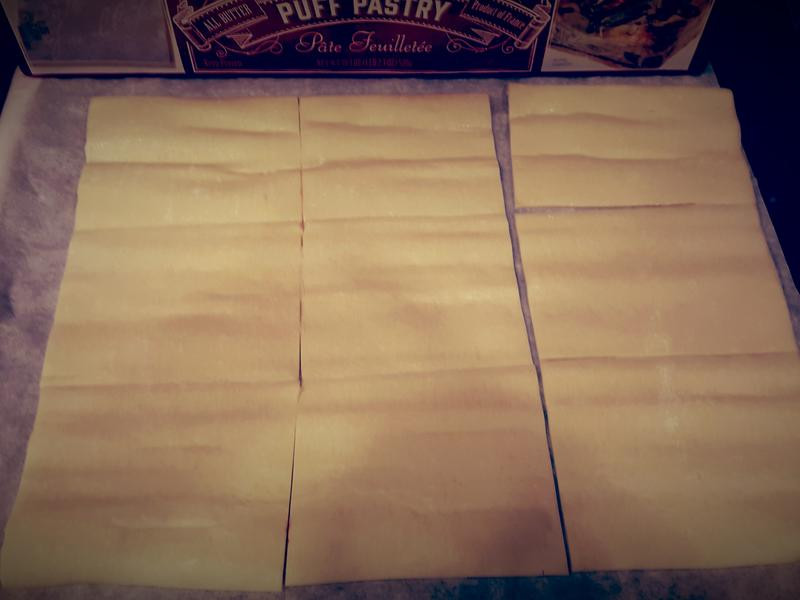
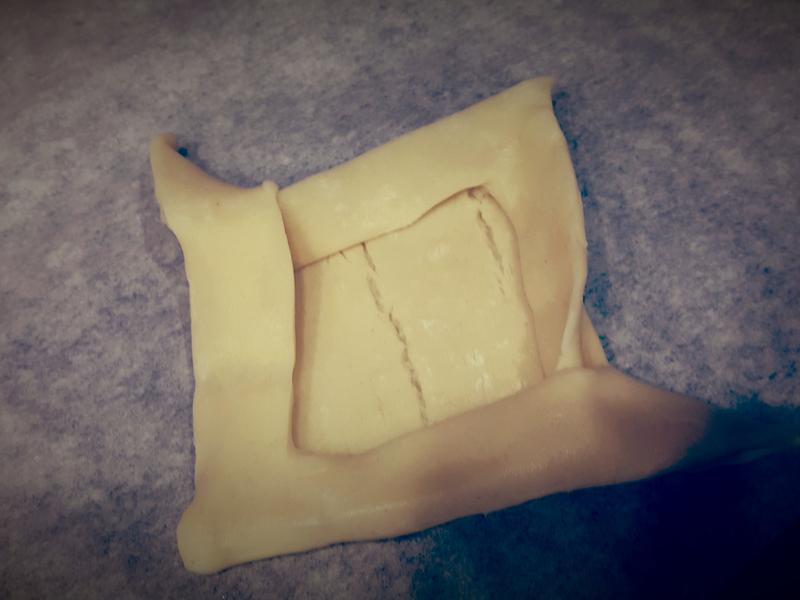
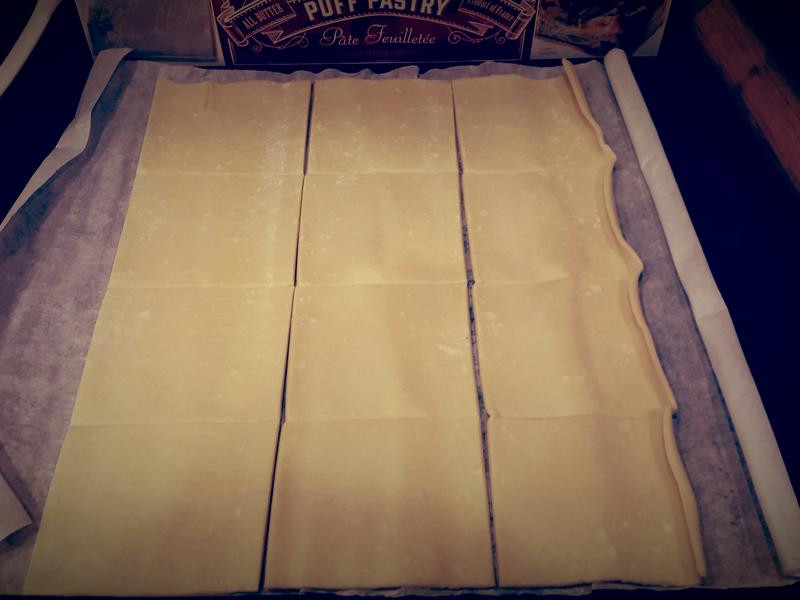
3现成派皮:2 片 (30cmx25cm),将冷冻起酥皮退冰后,取第一片,切成9 等分四方型
 4
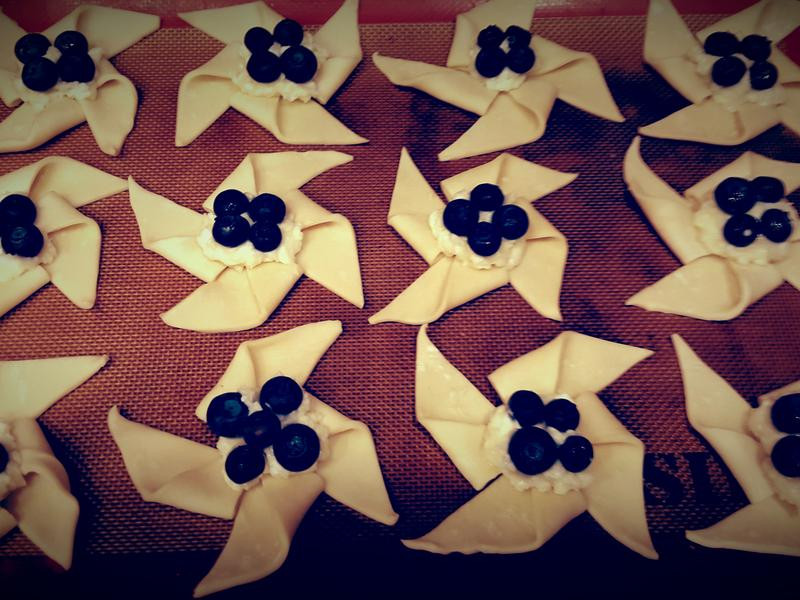
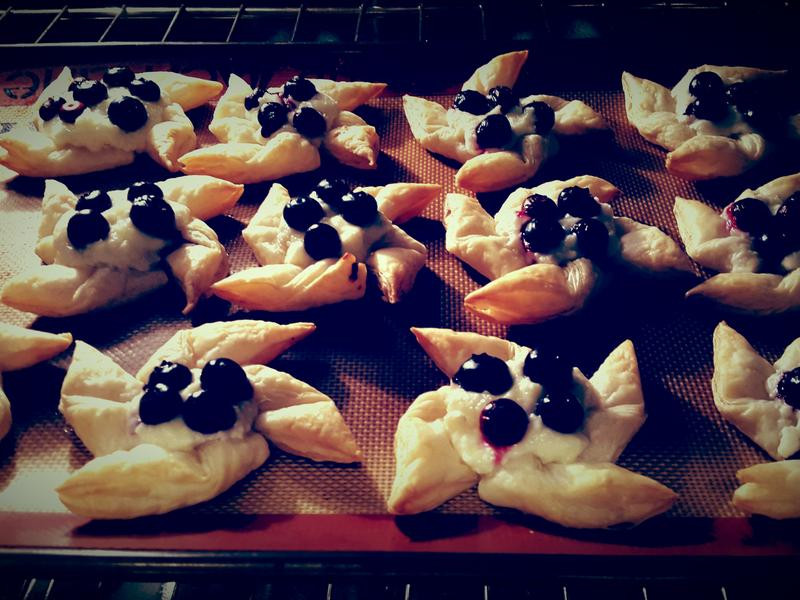
4[草莓酥皮塔-Strawberry Pastry Diamond:]先向对角折成三角形,在两边各切一刀,但不要切断;然后打开,会看到两刀L型的刀痕!接着左右两边对折就完成囉,如照片
 5
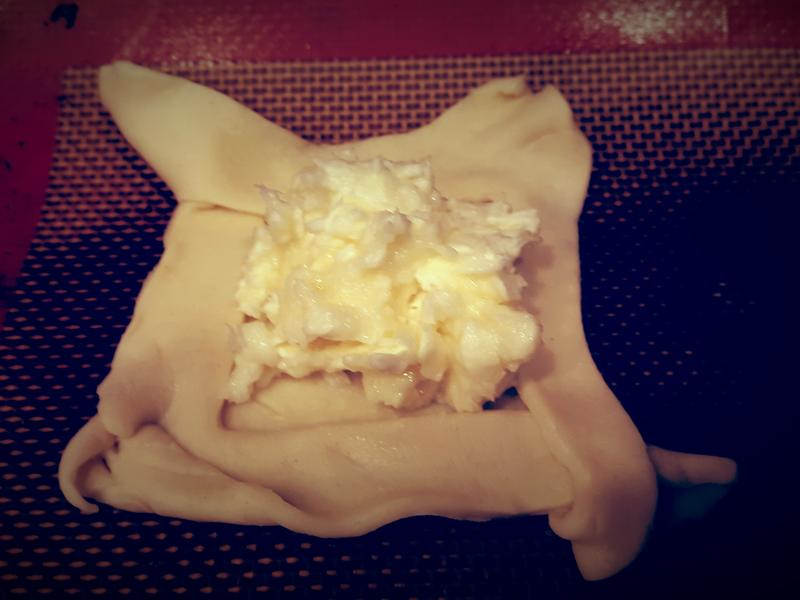
5在方形位置放满奶油奶酪馅
 6
6放上洗净切半的草莓
 7
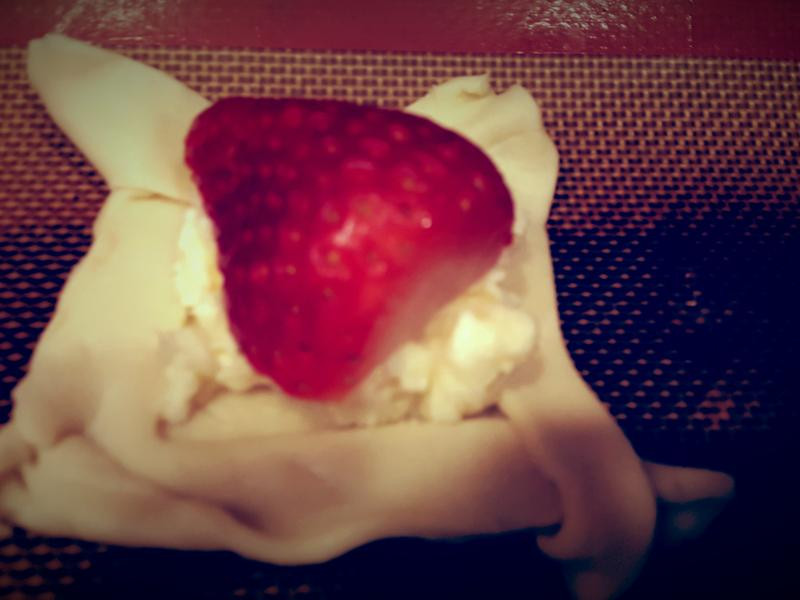
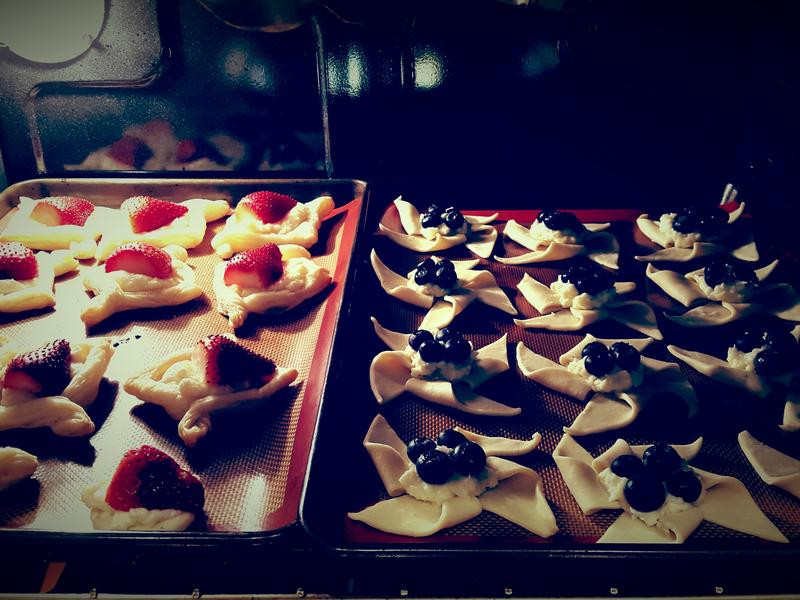
7就完成草莓酥皮塔-Strawberry Pastry Diamond整形部分
 8
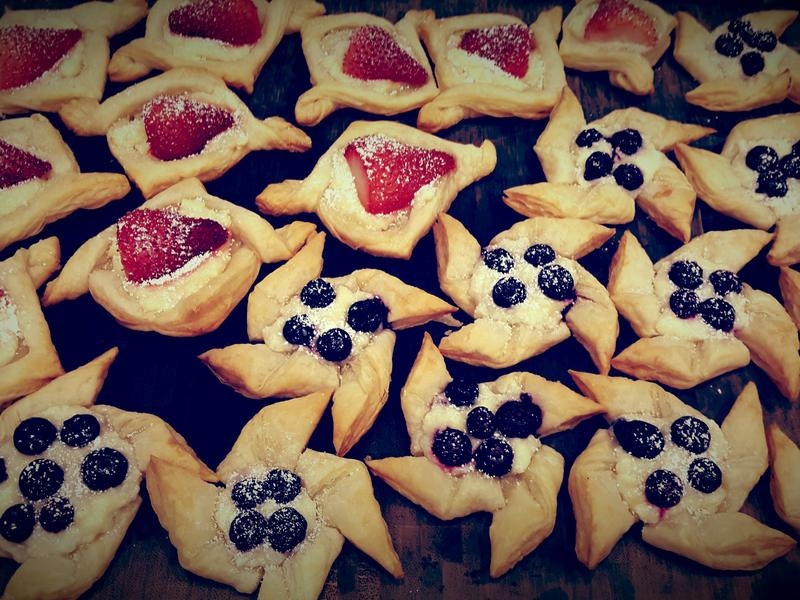
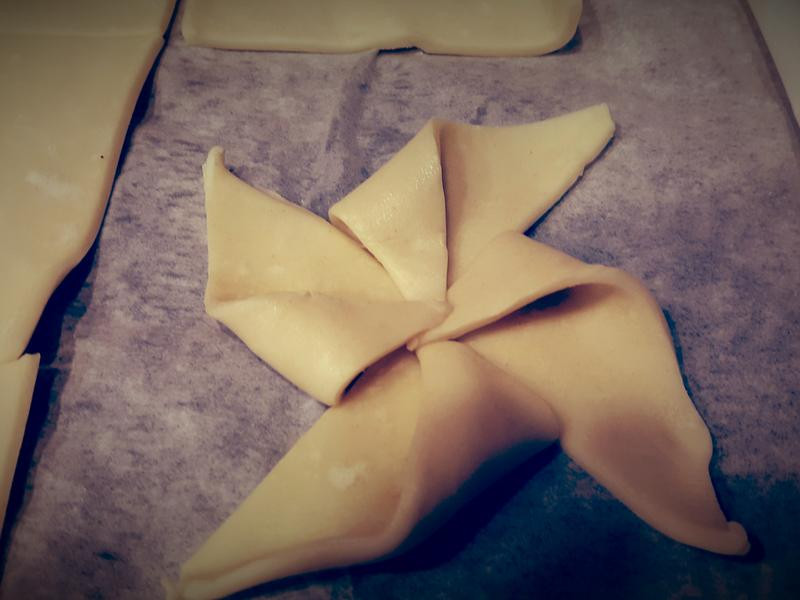
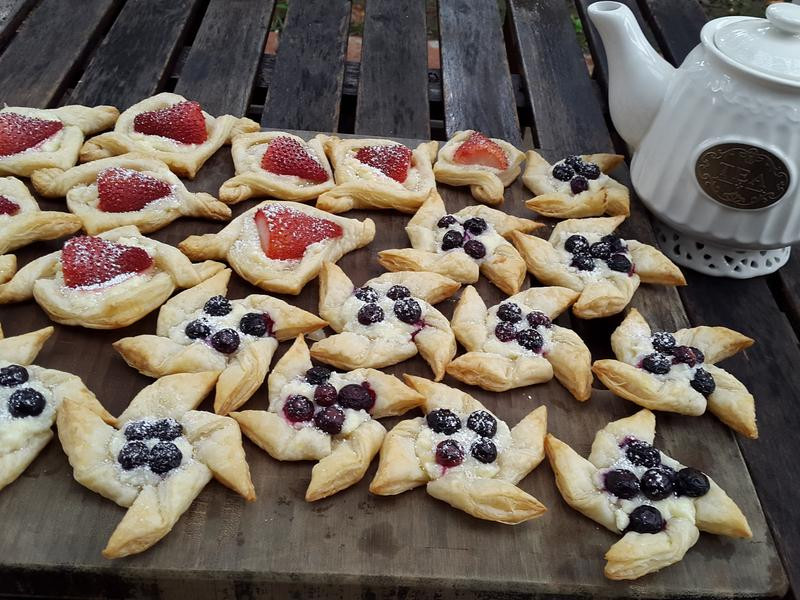
8[蓝莓风车酥皮塔-Blueberry Pastry Pinwheel]取第二片派皮,切成12 等分四方型
 9
9把四边各切一刀,不要切到中间
 10
10再依序把三角形作交叠,就成了可爱的风车整形!
 11
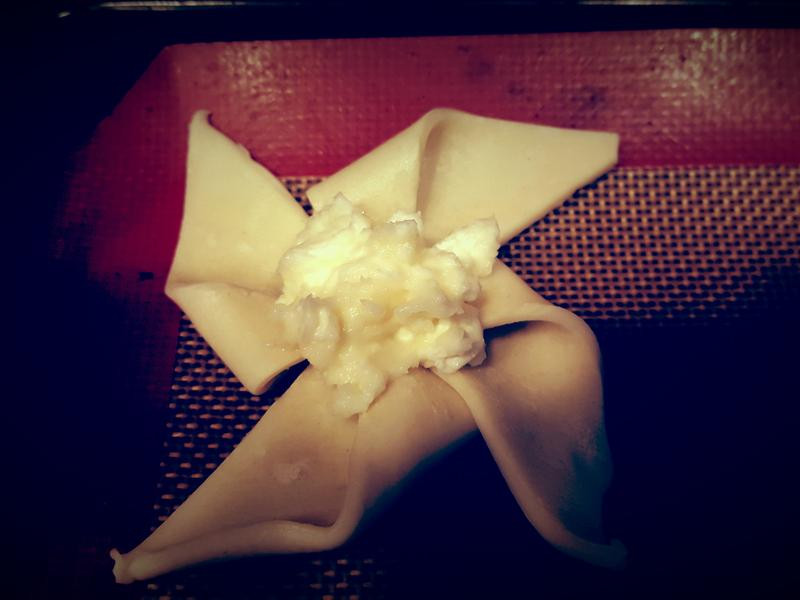
11先放满奶油奶酪馅
 12
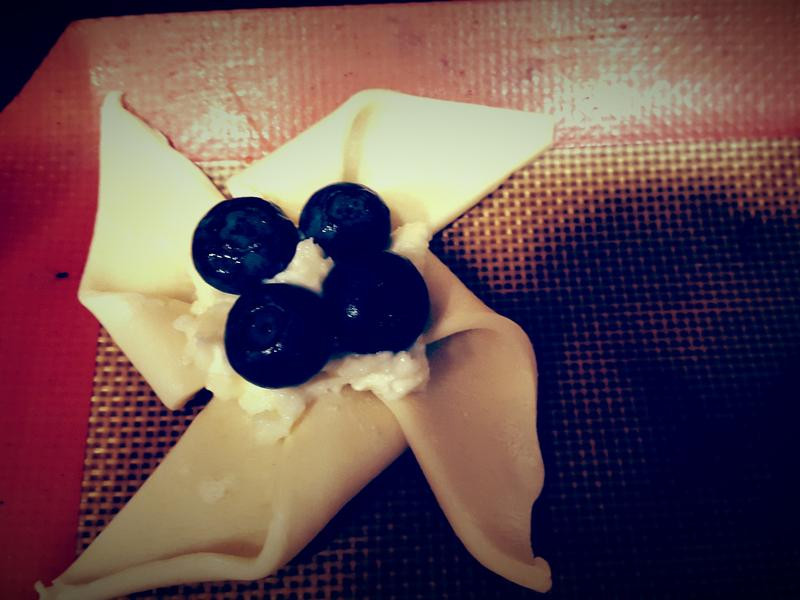
12再放上洗净的莓即可
 13
13就完成蓝莓风车酥皮塔-Blueberry Pastry Pinwheel整形部分
 14
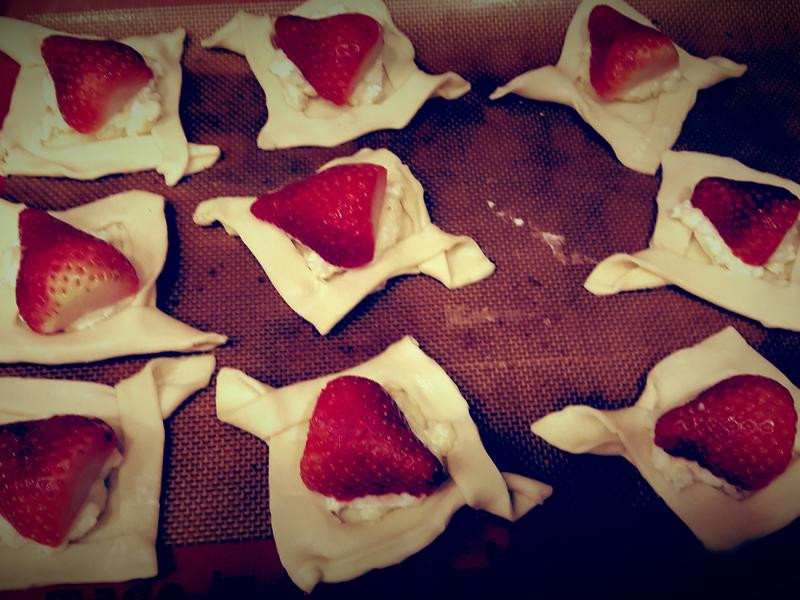
14放入已预热好温度约 400 degrees °F =200 degrees ° C.烘烤约15-20分钟,需注意每个烤箱温度不一, 故烘烤时间需视状况调整.
 15
15在烘培等待时~整个屋里充满香味, 好温暖开心呢!烤到酥派澎起来,表面呈现金黄色即可!
 16
16移至烤箱外放凉.就是漂亮的草莓酥皮塔-Strawberry Pastry Diamond?!!
 17
17还有这讨喜的蓝莓风车酥皮塔-Blueberry Pastry Pinwheel?!!
 18
18Puff Pastry 2 Ways:Strawberry Pastry Diamond & Blueberry Pastry Pinwheel!?!!
 19
19享用前,再洒点浪漫糖粉,草莓甜蜜蜜ㄉ和酥酥的蓝莓塔酸酸甜甜好好吃!!是作法简单又很有成就感的酥皮点心!!
 20
20搭配上香浓咖啡,当下午茶点心或各式节庆派对上,皆是受欢迎的Strawberry Pastry Diamond & Blueberry Pastry Pinwheel 酥派喔?!!!
21Bon Appétit & Enjoy!!!